Adding Staff Signature
Staff members can upload or draw a digital signature that will be automatically used in appointments and generated reports when a provider signature is required.
1. Access the Staff Section
-
Go to the > Staff section in the left panel.
2. Select the Staff Member
-
Choose the staff member for whom you would like to add or edit general information.
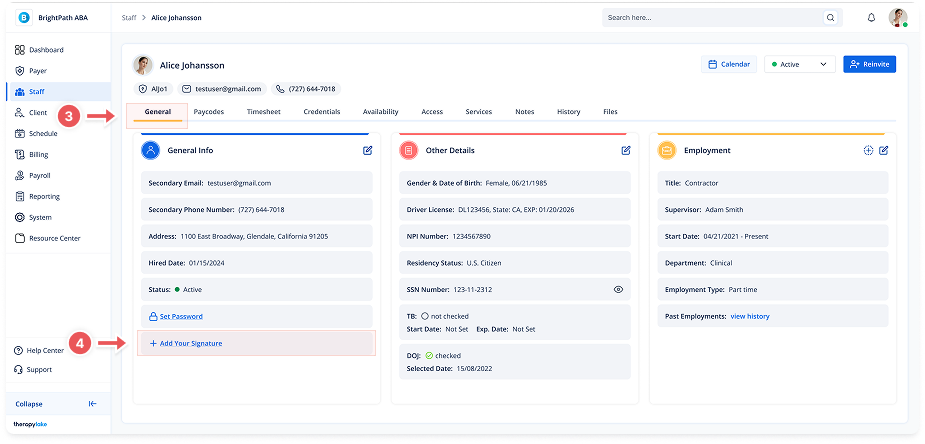
3. Ensure You Are on the General Tab
-
Make sure that you are on the General tab, if not, click on the General tab at the top of the page.
4. Locate the Signature Area
-
Under the General info section of the General tab, scroll down to find the Signature area.
-
Click + Add Your Signature to open the signature modal.
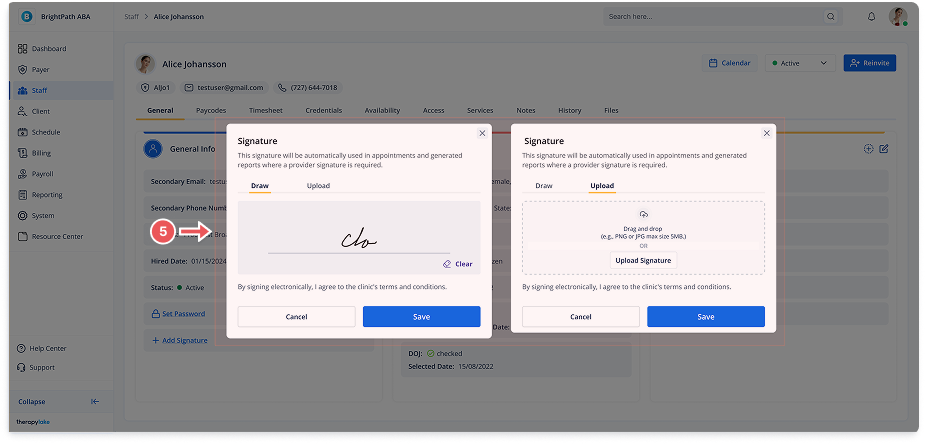
5. Add Your Signature
In the modal, choose one of the two options:
-
Draw: Use your mouse or touchscreen to draw a signature.
-
Upload: Drag and drop or upload a file (JPG, PNG, or PDF format, max size 5MB). Click Save to confirm.
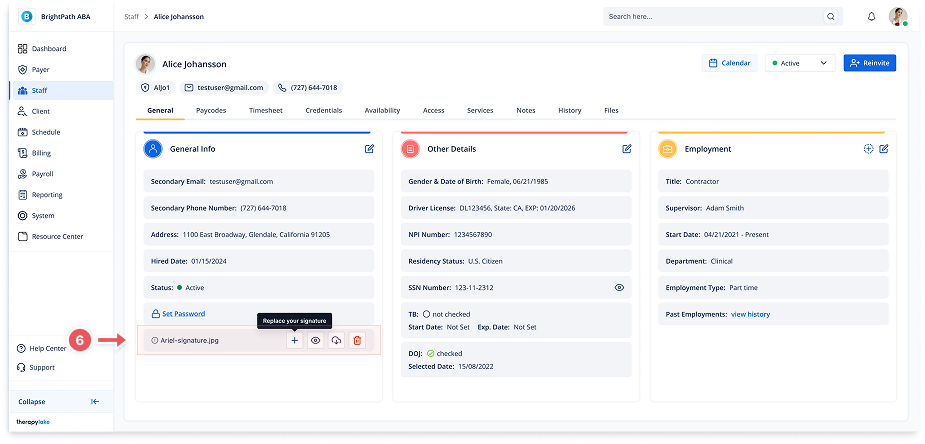
6. View the Signature
After saving, the signature file name and actions will remain visible in the General Info section.
You can manage it using the following actions:
Plus icon-Replace your signature by drawing or uploading a new one.
Eye icon-View your signature.
Download icon-Download the signature file to your device.
Trash icon-Delete your signature permanently.
Note: You can only store one signature at a time per staff member. Replacing it will overwrite the previous file.