Creating a New Form
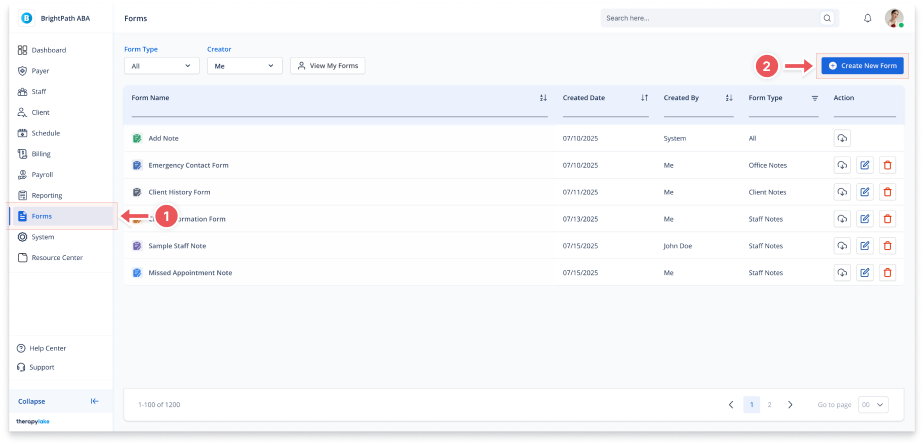
1. Navigate to Forms
-
Go to the left-hand navigation panel and click Forms.
2. Click "Create New Form"
-
In the top-right corner, click the Create New Form button to begin building your form.
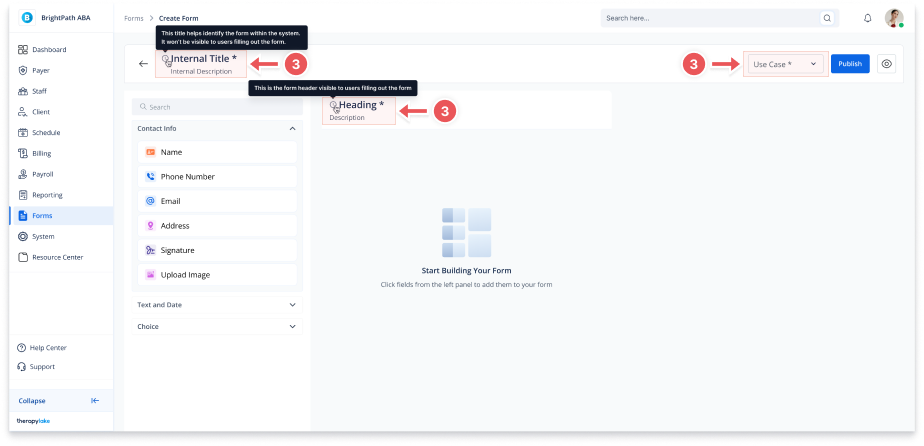
3. Enter Form Details
-
Internal Title: Add a title to identify the form within the system (not visible to users)
-
Internal Description: (Optional) Identify the form's purpose internally
-
Heading: Enter the form header (visible to users)
-
Description: (Optional) Appears below the heading
-
Use Case: Select where the form will be used (Staff Notes, Client Notes, etc.)
4. Add Fields to the Form
Use the left panel to search and add fields:
-
Contact Info: Name, Phone, Email, Address, Signature, Upload Image
-
Text and Date: Instructions, Paragraph, Long Text, Date Picker, Time
-
Choice: Multiple Choice, Single Choice, Single/Multiple Select
-
Autocomplete Data: Dynamic fields based on Use Case (except Timesheet Note)
🔔Note: Autocomplete Data fields only appear if the selected Use Case is not Timesheet Note.
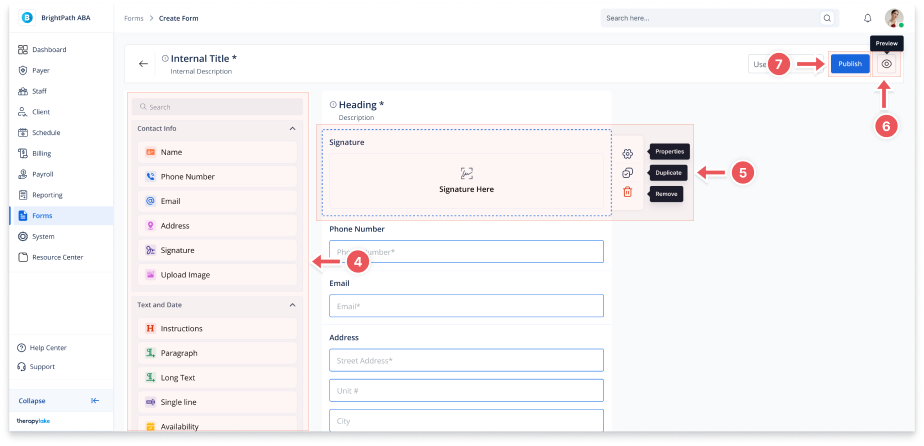
5. Field Actions (Hover)
When hovering over a field:
-
Properties: Configure instructions, required fields
-
Duplicate: Copy the field
-
Remove: Delete the field
6. Preview the Form
-
Click the eye icon next to Publish
-
View how the form appears to users
-
Click back arrow to return to editor
7. Publishing the Form
-
Click Publish when all required fields are complete
-
Tooltips will guide you if anything is missing