

Adding a File to Client's Authorization
1. Access the Client Section
-
Go to the > Client section in the left panel.
2. Select the Client
-
Choose the client for whom you want to add a file to their authorization.
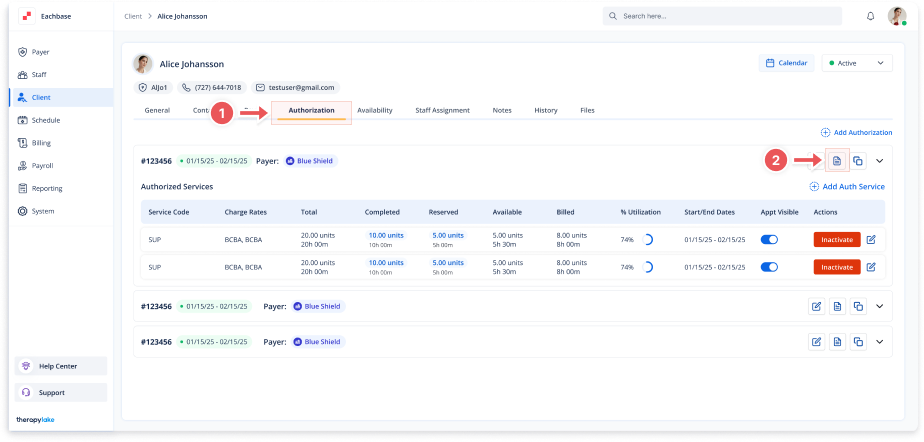
3. Navigate to the Authorization Tab
-
Click on the Authorization tab at the top of the client's page.
4. Select the Authorization
-
Find the specific authorization to which you want to add a file.
5. Add a New File
-
Click the Upload Document button within the authorization details.
6. Fill in the File Details
-
In the Upload Document modal, fill in the required fields:
-
Document Name: Enter the name of the file.
-
File: Click to upload or drag and drop the file (PDF, PNG, JPG, or CSV).
-
7. Save the File
-
Click the Save button to upload and save the file to the authorization.