

Locking/Unlocking Multiple Appointments
1. Navigate to the Schedule Section
-
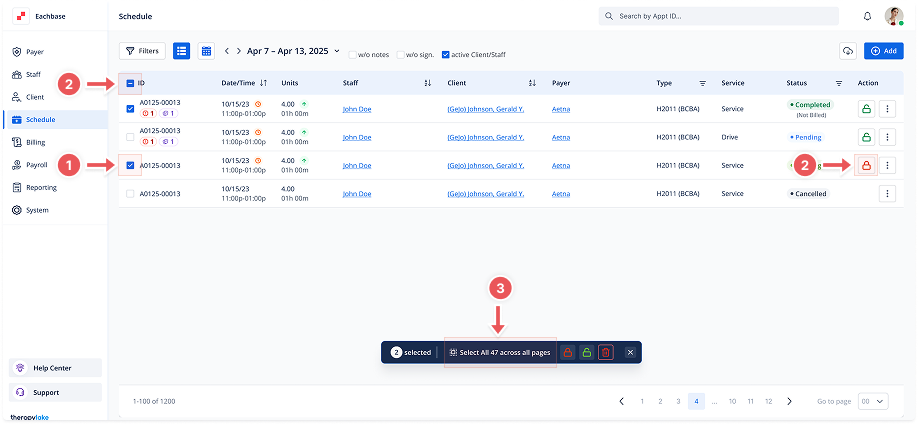
Click on Schedule from the left-side navigation panel.
2. Select Multiple Appointments
You have several options to select appointments:
-
Manually Select: Check the checkboxes to the left of each appointment you want to lock or unlock.
-
Select All on Page: Click the checkbox next to the ID column title to select all appointments on the current page.
-
Select Across All Pages: After clicking the checkbox to select all appointments on the page, a message will appear above the table indicating that all appointments on the current page are selected. You will also see an option to "Select all appointments across all pages." Click this option to select all appointments across all pages; these appointments will be narrowed down based on the filters you have applied.
3. Lock Selected Appointments
-
Once you have selected the appointments, click the Lock Selected button (red).
-
A Confirm Lock Selected modal will appear.
-
Click Lock Selected to confirm. The selected appointments will be locked, and their icons will turn to red locks.
4. Unlock Selected Appointments
-
Once you have selected the appointments, click the Unlock Selected button (green) at the top right of the table.
-
A Confirm Unlock Selected modal will appear.
-
Click Unlock Selected to confirm. The selected appointments will be unlocked, and their icons will turn back to green locks.
5. Use Filters to Narrow Down Selection (Optional)
-
You can use the Filters at the top of the schedule to narrow down the list of appointments by:
-
Staff Member
-
Client
-
Event Type
-
Event Status
-
Date of Service
-
Flagged status
-