Adding Files to a Client
1. Access the Client Section
-
Go to the > Client section in the left panel.
2. Select the Client
-
Choose the client for whom you want to add files.
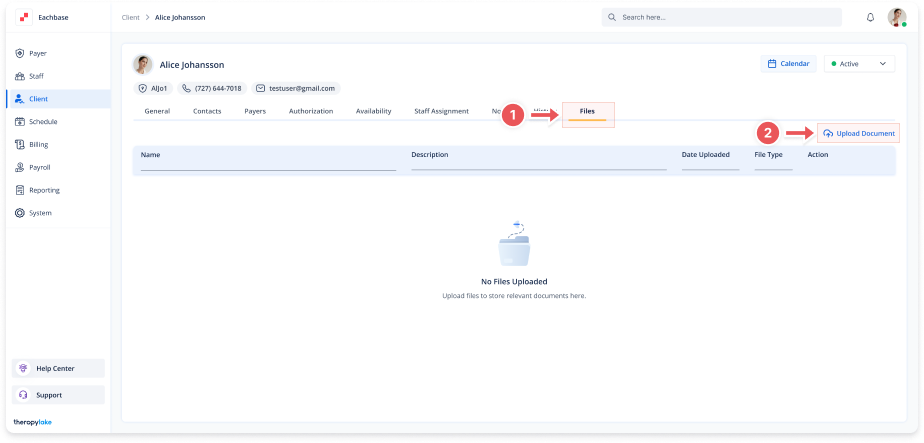
3. Navigate to the Files Tab
-
Click on the Files tab at the top of the client's page.
4. Add a New File
-
Click the Upload Document button to add relevant documents or files associated with the client.
5. Upload the File
-
In the Upload Document modal that appears, fill in any necessary details.
-
Click to upload or drag and drop the file into the drag-and-drop box.
6. Review Uploaded Files
-
Once the file is uploaded, it will appear at the bottom of the modal. You can continue uploading more files as needed.
7. Save the Uploaded Files
-
After adding all the files, click the Add button on the bottom right of the modal.
8. View Uploaded Files
-
The uploaded files will be listed in the Files tab for the selected client.