Viewing the Submitted Claims List
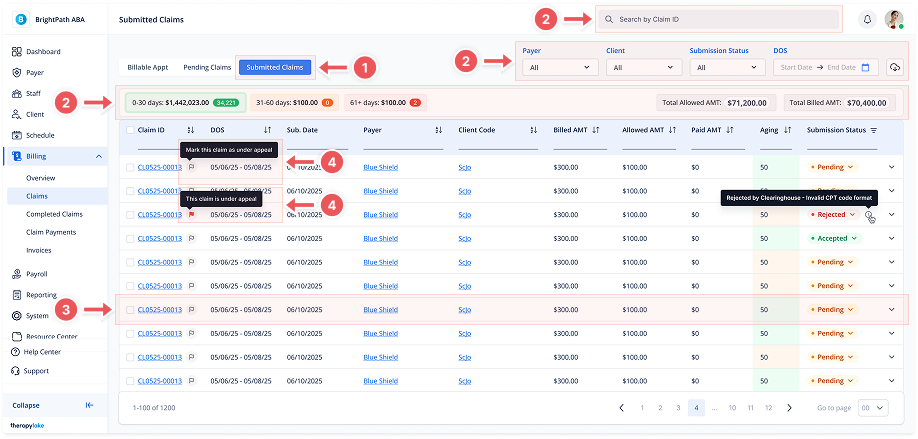
1. Navigate to Submitted Claims:
-
Go to the left sidebar and click on Billing > Claims > Submitted Claims.
2. Use Filters to Refine the View
At the top of the page, use the filters to narrow down results:
-
Layer
-
Client
-
Submission Status (All, Pending, Rejected, Accepted, Has Appeals)
-
Date of Service (DOS) — Start and End Date
-
Search bar — Find by Batch ID, Claim ID, or Client name
You'll also see tabs to filter claims by aging range:
-
0–30 days, 31–60 days, 61+ days
Above the table, summary totals are shown:
-
Total Allowed Amt
-
Total Paid Amt
3. View Submitted Claims Table
The table includes the following columns:
-
Claim ID (clickable to view claim details)
-
DOS (Date of Service)
-
Submitted Date
-
Payer
-
Client Code (linked)
-
Billed AMT
-
Allowed AMT
-
Paid AMT
-
Aging (in days)
-
Submission Status
Statuses include:-
Pending
-
Rejected (with rejection reason)
-
Accepted
-
4. Marking a Claim as Under Appeal
You can now mark claims as being under appeal directly from the Submitted Claims list.
Where to Find It:
In the Claim ID column, you'll see a flag icon beside each claim.
Flag Icon Actions:
-
Gray Flag – Not under appeal
-
Hover to see: "Mark this claim as under appeal"
-
Click it to activate appeal mode for that claim.
-
-
Red Flag – Currently under appeal
-
Hover to see: "This claim is under appeal"
-
This is a visual indicator only (no additional click action required).
-
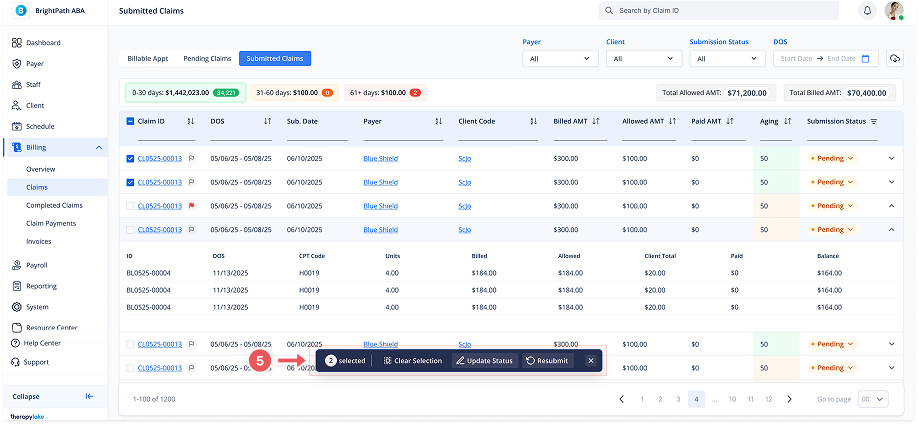
5. Actions on Selected Claims
When you select one or more claims using the checkboxes, a dark action bar will appear at the bottom of the screen.
-
Clear Selection
Deselects all currently selected claims. -
Resubmit
Allows you to resubmit the selected claims if applicable. -
Update Status
Opens a modal where you can bulk update the Submission Status of the selected claims to:-
✅ Accepted
-
🟡 Pending
-
❌ Rejected
(If you choose Rejected, a reason may be required in a follow-up step depending on configuration.)
-
-
❌ X icon
Closes the action bar without taking any action.