

Steps to Add a Service Appointment
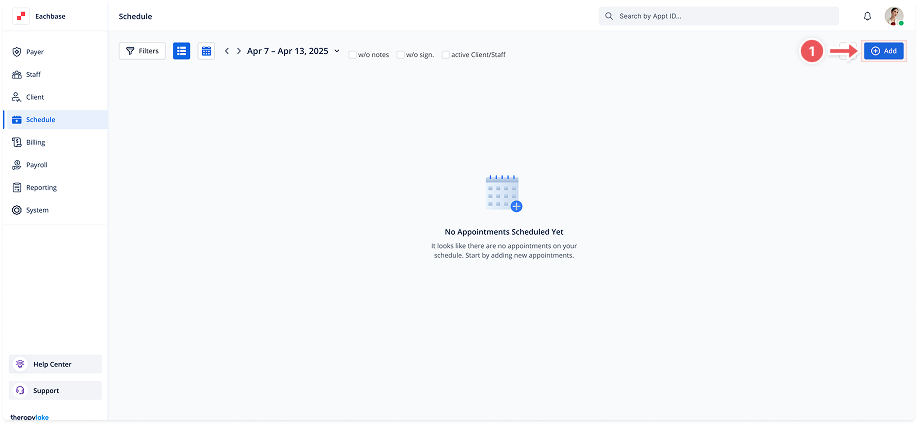
1. Navigate to the Schedule View
-
Click on the Schedule tab located in the left pane to access the schedule view.
2. Open Add Appointment Modal
-
Click on the Add button located at the top right corner of the schedule view.
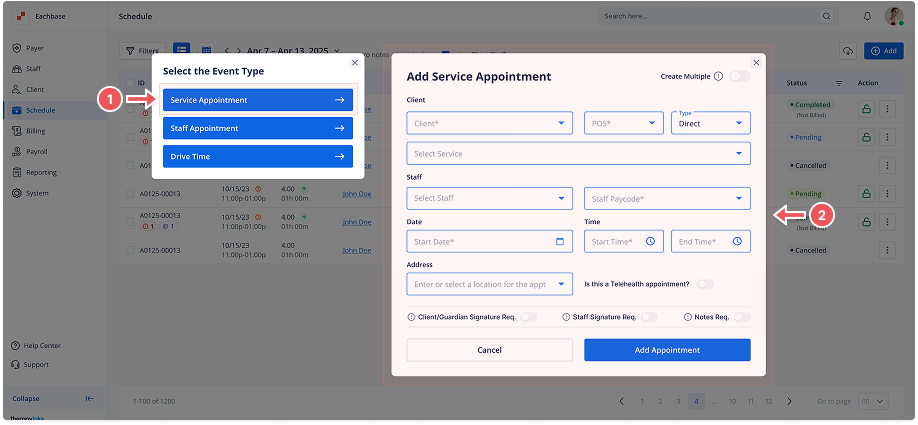
3. Select Event Type
-
A modal labeled Select the Event Type will appear. Choose Service Appointment from the list of event types.
4. Fill in Appointment Details
In the Add Service Appointment modal, fill out the necessary fields:
-
Client: Select the client from the dropdown list.
-
Service: Select the service to be provided.
-
Type: Select the type of service from the dropdown options.
-
Place of Service: Choose the location where the service will be provided.
-
Staff List: Choose the staff member who will be providing the service.
-
Staff Paycode: Choose the paycode for the staff member.
-
Start Date: Select the date when the service appointment will take place.
-
Start Time: Enter the start time of the service appointment.
-
End Time: Enter the end time of the service appointment.
-
Address: Enter or select location for the appointment.
5. Optional: Require Signature and Notes
-
Toggle the Require Signature and Require Notes switches if the appointment needs a signature or additional notes.
6. Optional: Telehealth appointment
-
Toggle the “Is this a Telehealth appointment?” switch if necessary.
7. Add the Appointment
-
Once all details are filled in, click the Add button to create the service appointment.
8. View the Newly Added Appointment
-
The appointment will now appear in the schedule view. You can see it either in the List View or the Calendar View according to the selected date and time.