

Adding Authorization
Overview
This guide explains how to add an authorization and its associated authorized services. You can add authorized services directly within the authorization modal or separately.
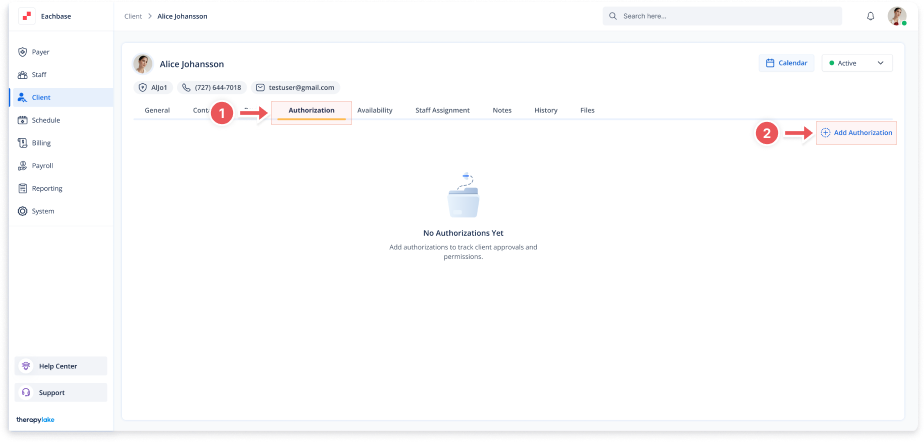
1. Access the Client Section
• Go to the > Client section in the left panel.
2. Select the Client
• Choose the client for whom you want to add an authorization.
3. Navigate to the Authorization Tab
• Click on the Authorization tab at the top of the client's page.
4. Add a New Authorization
• Click the + Add Authorization button at the top right of the page.
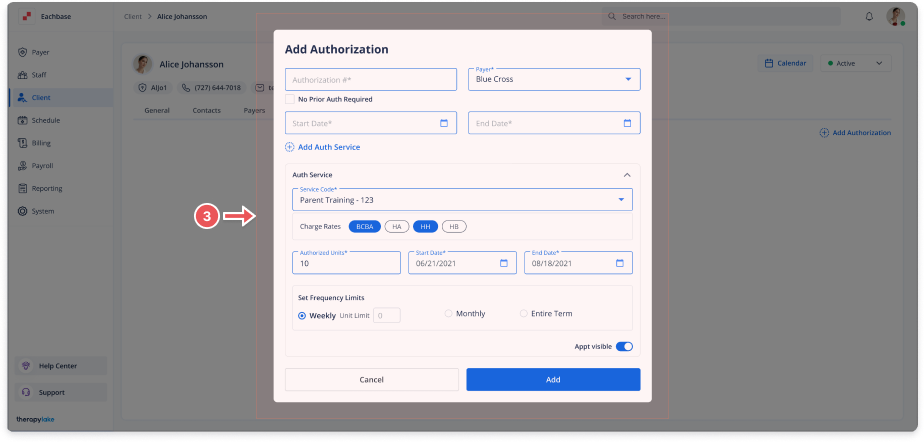
5. Fill in the Authorization Details
-
In the Add Authorization modal, fill in the required fields:
-
Authorization #: Enter the authorization number.
-
Start Date: Enter the start date in MM/DD/YYYY format.
-
End Date: Enter the end date in MM/DD/YYYY format.
-
Payer: Select or enter the payer.
-
6. Add Authorized Services
-
Fill in the required fields:
-
Service Code: Enter the service code.
-
Charge Rates: Select or enter the charge rates.
-
Total Units: Enter the total units authorized.
-
Start Date and End Date: Enter the service start and end dates.
-
Set Frequency Limits: Choose frequency limits (e.g., Weekly, Monthly, Entire Term).
-
Appointment Visibility Toggle:
-
On: Appointments will be visible.
-
Off: Appointments will be hidden.
-
-
7. Save the Authorization
• Click the Add button at the bottom right of the modal to save the authorization and any associated authorized services.
8. Review the New Authorization
• The newly added authorization and authorized services will appear under the Authorizations tab.
🔔Note
Ensure that the client has a payer setup in the system. Without a payer, you will not be able to add an authorization for the client. Additionally, without an authorization, you will not be able to add any authorized services. Make sure to complete these steps in the correct order to ensure smooth setup and management of client services.